
If you are looking to use automation to test a website, one of the best open source options available is Selenium. If you need to test desktop apps or other non-web apps, Selenium is not the right solution for you.
Selenium itself is only a set of tools, you will need to code your tests using a test framework and an IDE. Selenium works with a number of languages — java is the most popular. There are plenty of examples online showing how to use Selenium with java.
This tutorial series will be dedicated to C#. I recently did a fresh install of Visual Studio on my laptop and all of this code has been tested.
In this article I am going to show you how to:
- Create a test project
- Add Selenium DLL’s to the project
- Write Selenium tests from scratch using C#
Step 1. Download a Visual Studio IDE if you don’t already have one. Microsoft offers many different versions of Visual Studio.
In these examples I am using Microsoft Visual Studio Express 2013 for Windows Desktop (which is free).
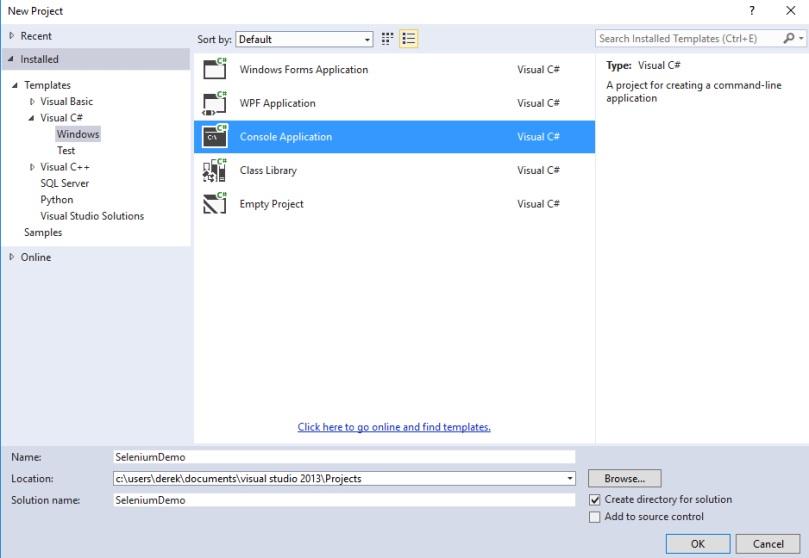
Step 2. Create a new C# console app and name the solution “SeleniumDemo”
Step 3. Get the latest Selenium DLL’s from:
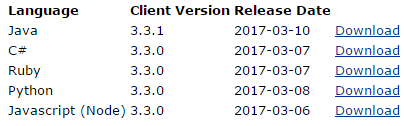
Unzip the DLL’s and save to C:\selenium-dotnet-3.3.0\
Step 4. Get the latest version of chromedriver from:
https://sites.google.com/a/chromium.org/chromedriver/
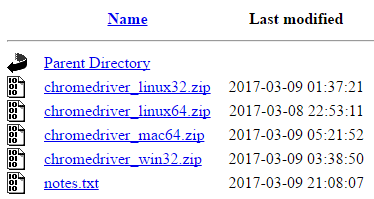
Unzip the chromedriver and save to C:\chromedriver\
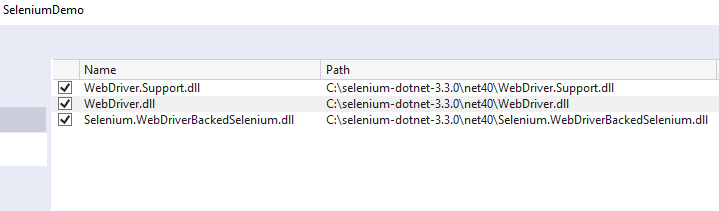
Step 5. Add project references pointing to the Selenium DLL’s
Step 6. Use the Program class to create a simple self-contained browser test
(Refer to inline comments to understand what is happening)
using System;
using System.Linq;
using System.Text;
using OpenQA.Selenium;
using OpenQA.Selenium.Chrome;
using OpenQA.Selenium.Support.UI;

namespace SeleniumDemo
{
 class Program
 {
 static void Main(string[] args)
  {
   //test vars
   string myTestUrl = "https://wordpress.com";
   string myId = "mynameisfred";
   string myPw= "fredflintstone";
   int myTimeout = 10;

   //set chromedriver options
   var options = new ChromeOptions();
   //this will get rid of the yellow warning bar
   options.AddArguments("test-type");
   //this will maximize the browser
   options.AddArgument("--start-maximized");
   //this creates a new chromedriver instance
   IWebDriver driver = new ChromeDriver(@"C:\chromedriver", options);

   try
   {
    //navigate to URL
    driver.Navigate().GoToUrl(myTestUrl);
    //wait for login link to appear
    WebDriverWait wait = new WebDriverWait(driver, TimeSpan.FromSeconds(myTimeout));
    wait.Until(ExpectedConditions.ElementExists(By.Id("navbar-login-link")));
    //click login link
    driver.FindElement(By.Id("navbar-login-link")).Click();
    //enter ID and PW
    driver.FindElement(By.XPath("//*[@id='user_login']")).SendKeys(myId);
    driver.FindElement(By.XPath("//*[@id='user_pass']")).SendKeys(myPw);
    //click button
    driver.FindElement(By.Id("wp-submit")).Click();
   }
   catch (Exception e)
   {
    Console.WriteLine("Encountered an unforeseen error. Stack trace = " + e.Message);
   }
  }
 }
}
Step 7. Build and run.
You should see a new browser launch and attempt to login using a bogus ID/PW combo.
This script utilized Selenium functions called WebDriverWait and By.
In the code sample below, WebDriver will wait until a certain condition is met or until a timeout occurs. If you get a timeout, WebDriver will throw an exception.
WebDriverWait wait = new WebDriverWait(driver, TimeSpan.FromSeconds(myTimeout));
wait.Until(ExpectedConditions.ElementExists(By.Id("navbar-login-link")));
WebDriver finds the login web element using an ID locator:
driver.FindElement(By.Id("navbar-login-link")).Click();
Elsewhere in the script, XPath was used as a locator instead of ID.
